Service
SERVICE
PAUL DEAN
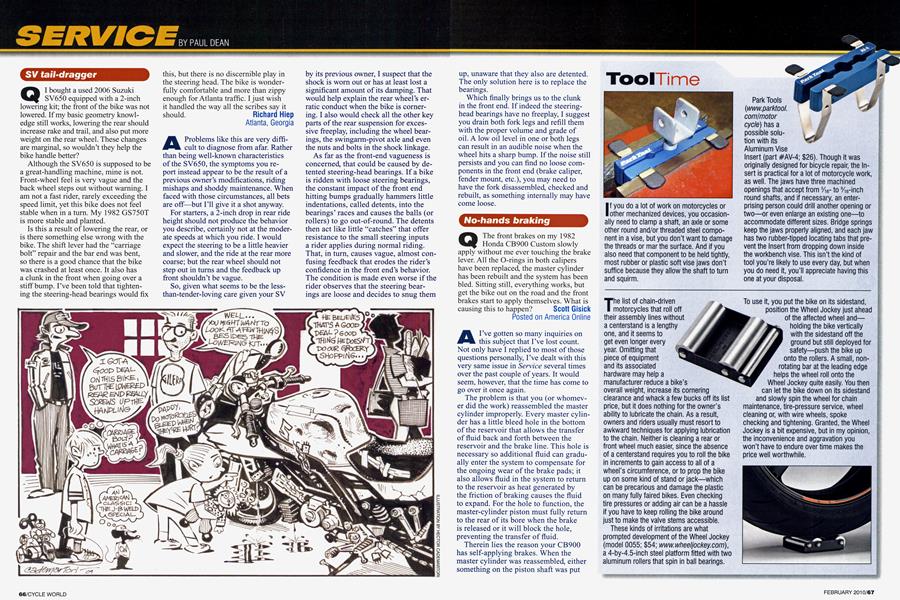
SV tail-dragger
Q I bought a used 2006 Suzuki SV650 equipped with a 2-inch lowering kit; the front of the bike was not lowered. If my basic geometry knowledge still works, lowering the rear should increase rake and trail, and also put more weight on the rear wheel. These changes are marginal, so wouldn’t they help the bike handle better?
Although the SV650 is supposed to be a great-handling machine, mine is not. Front-wheel feel is very vague and the back wheel steps out without warning. I am not a fast rider, rarely exceeding the speed limit, yet this bike does not feel stable when in a turn. My 1982 GS750T is more stable and planted.
Is this a result of lowering the rear, or is there something else wrong with the bike. The shift lever had the “carriage bolt” repair and the bar end was bent, so there is a good chance that the bike was crashed at least once. It also has a clunk in the front when going over a stiff bump. I’ve been told that tightening the steering-head bearings would fix this, but there is no discernible play in the steering head. The bike is wonderfully comfortable and more than zippy enough for Atlanta traffic. I just wish it handled the way all the scribes say it should. Richard Hiep Atlanta, Georgia
A Problems like this are very difficult to diagnose from afar. Rather than being well-known characteristics of the SV650, the symptoms you report instead appear to be the result of a previous owner’s modifications, riding mishaps and shoddy maintenance. When faced with those circumstances, all bets are off—but I’ll give it a shot anyway.
For starters, a 2-inch drop in rear ride height should not produce the behavior you describe, certainly not at the moderate speeds at which you ride. I would expect the steering to be a little heavier and slower, and the ride at the rear more coarse; but the rear wheel should not step out in turns and the feedback up front shouldn’t be vague.
So, given what seems to be the lessthan-tender-loving care given your SV by its previous owner, I suspect that the shock is worn out or has at least lost a significant amount of its damping. That would help explain the rear wheel’s erratic conduct when the bike is cornering. I also would check all the other key parts of the rear suspension for excessive freeplay, including the wheel bearings, the swingarm-pivot axle and even the nuts and bolts in the shock linkage.
As far as the front-end vagueness is concerned, that could be caused by detented steering-head bearings. If a bike is ridden with loose steering bearings, the constant impact of the front end hitting bumps gradually hammers little indentations, called detents, into the bearings’ races and causes the balls (or rollers) to go out-of-round. The detents then act like little “catches” that offer resistance to the small steering inputs a rider applies during normal riding. That, in turn, causes vague, almost confusing feedback that erodes the rider’s confidence in the front end’s behavior. The condition is made even worse if the rider observes that the steering bearings are loose and decides to snug them up, unaware that they also are detented. The only solution here is to replace the bearings.
Which finally brings us to the clunk in the front end. If indeed the steeringhead bearings have no freeplay, I suggest you drain both fork legs and refill them with the proper volume and grade of oil. A low oil level in one or both legs can result in an audible noise when the wheel hits a sharp bump. If the noise still persists and you can find no loose components in the front end (brake caliper, fender mount, etc.), you may need to have the fork disassembled, checked and rebuilt, as something internally may have come loose.
No-hands braking
QThe front brakes on my 1982 Honda CB900 Custom slowly apply without me ever touching the brake lever. All the O-rings in both calipers have been replaced, the master cylinder has been rebuilt and the system has been bled. Sitting still, everything works, but get the bike out on the road and the front brakes start to apply themselves. What is causing this to happen? Scott Gisick Posted on America Online
A I’ve gotten so many inquiries on this subject that I’ve lost count.
Not only have I replied to most of those questions personally, I’ve dealt with this very same issue in Service several times over the past couple of years. It would seem, however, that the time has come to go over it once again.
The problem is that you (or whomever did the work) reassembled the master cylinder improperly. Every master cylinder has a little bleed hole in the bottom of the reservoir that allows the transfer of fluid back and forth between the reservoir and the brake line. This hole is necessary so additional fluid can gradually enter the system to compensate for the ongoing wear of the brake pads; it also allows fluid in the system to return to the reservoir as heat generated by the friction of braking causes the fluid to expand. For the hole to function, the master-cylinder piston must fully return to the rear of its bore when the brake is released or it will block the hole, preventing the transfer of fluid.
Therein lies the reason your CB900 has self-applying brakes. When the master cylinder was reassembled, either something on the piston shaft was put in the wrong place or the wrong rebuild kit was used. In any case, the piston is blocking the bleed hole so that as you ride the bike, the brake fluid heats up due to the friction between the pads and the rotors. Friction occurs even when the brakes are not being applied because the pads lightly “kiss” the rotors. The fluid therefore expands but has no place to go; the bleed hole is blocked. So, the fluid has no choice but to push the caliper pistons and their pads harder and harder against the rotors, which creates even more heat and thus more braking. You’re lucky that the brakes didn’t suddenly lock up altogether and cause you to crash.
Obviously, the master cylinder needs to be taken apart and inspected for the proper assembly of the piston rod and its components. Until you get the piston to retract far enough to clear the bleed hole, the brakes are going to apply themselves every time you ride the bike.
Wants to get engaged
QI recently purchased a 1981 Yamaha Virago 750, and its shift lever moves up and down without engaging a gear. What could be the cause of this? Is it something I could fix myself or do I need to take it to a Yamaha dealer? Also, where can I obtain a copy (reprint or photocopy) of the owner’s manual for this bike (and maybe for my old Honda CB750 and Kawi 650 CSR)? Leon E. Griffin III Winnisquam, New Hampshire
A There are several possible causes of your Virago’s unwillingness to engage a gear, but the most likely are either a dislodged retaining clip on the gearshift shaft or a broken spring on a crucial part of the gear-selector mechanism called a pawl.
First, grab the end of the shift shaft and try pulling it in and out of the engine cover. If you can move it more than about a sixteenth of an inch, the retaining clip has come loose. The clip sits in a groove on the shaft just on the inside of the left engine cover and prevents the shaft from having excessive side-to-side movement. If the clip comes loose, the shaft can move far enough to the left that the gearselector pawl, which is farther inboard on the shaft, no longer engages the shift drum. The shift lever then just moves up and down without changing gears. The fix involves simply removing the left engine cover and replacing the clip. If the retaining clip is not dislodged, the spring on the gear-selector pawl is the probable culprit. As seen in the accompanying illustration, the pawl is a little pivoting arm with opposing hook-like teeth on one end and a small spring on the other. When the shift lever is moved, one of those teeth hooks onto one of the pins on the end of the shift drum, causing the drum to rotate and change gears. When the shift lever is released, the tapered backside of the pawl’s hook then has to slide under a shift-drum pin to re-center itself for the next shift. The pawl therefore is springloaded so it always is positioned where it can engage the pins on the drum. But if that little spring falls off or breaks, the hinged pawl will swing down and dangle where it cannot engage the shift drum.
As with the retaining clip, replacing the pawl spring is neither a complicated nor an expensive job. After you remove the left engine cover, all of the gear-selector components, including the pawl, are easily accessible, and the spring (available either through Yamaha or Bike Bandit at www. bikebandit.com) lists for only $1.06.
Finding an owner’s manual for your Virago will be a little more difficult but not impossible. Yamaha’s website says the manuals are “out of stock,” but you can place an order for one, although the company makes no claims regarding when—or if—such a manual might actually be available. Your best bet would be to search the Internet for “Yamaha 750 Virago Owner’s Manual.” Same goes for manuals you might need for any of the other older bikes in your garage.
A fasten-ating subject
QWhen using the blue, mediumstrength Loctite on a bolt or nut, is it harmful to the bond if said bolt/nut is re-torqued? I was mercifully introduced to this product after multiple loose fasteners on my pre-Twin Cam Harley-Davidson Softail, but I never understood whether or not the bonding agent lost its effectiveness if the nut/bolt in question underwent movement while checking its tightness after some use. William Winterstein Sudlersville, Maryland
A If you consider the purpose of thread locker, which is to prevent a fastener from moving, the answer should be obvious: Yes, the effectiveness of the locking agent will be compromised if the fastener is moved. But to what degree it is affected is hard to pinpoint. It depends upon numerous factors—if the nut or bolt actually moved when re-torqued, and if so, how far, as well as the size of the bolt, the pitch of the threads, the cleanliness of the nut/ bolt/threaded hole prior to installation, the amount of torque involved and probably a lot of other factors that I’m not smart enough to know about.
It’s safe to say, though, that even if the thread locker is compromised, the fastener will still be less likely to come loose than if it had not been treated with the locking agent in the first place. The strong bond between the threads of both affected components will have been broken, but the locking material remains, and its presence will provide enough friction to offer better fastener retention than would occur without it.
The best policy is not to re-torque fasteners that have been treated with thread locker—unless, of course, you remove them altogether, clean the threads as thoroughly as possible, apply fresh thread locker, and then reinstall and torque them.
Got a mechanical or technical problem and can’t find workable solutions in your area? Or are you eager to learn about a certain aspect of motorcycle design and technology? Maybe we can help. If you think we can, either: 1) Mail a written inquiry, along with your full name, address and phone number, to Cycle World Service, 1499 Monrovia Ave., Newport Beach, CA 92663; 2) fax it to Paul Dean at 949/631-0651; 3) e-mail it to CWIDean @aol.com; or 4) log onto www.cycleworld.com, click on the “Contact Us” button, select “CW Service” and enter your question. Don’t write a 10-page essay, but if you’re looking for help in solving a problem, do provide enough information to permit a reasonable diagnosis. Include your name if you submit the question electronically. And please understand that due to the enormous volume of inquiries we receive, we cannot guarantee a reply to every question.